Requirements
To proceed with the tutorial it is supposed you already meet the following requirements:
- You have an active Firebase project
- You own a valid domain
I will not go into the details on how to create or integrate Firebase with your web framework. However, if you do not have a project, you can create a new one in the Firebase Console.
When you first create a Firebase project, the default auth domain will have the following structure: yourappid.firebaseapp.com. This is the domain that will appear when users will sign up with external providers, such as Google.
Configuring Firebase Auth providers
For this tutorial we will use the Google provider to check that the domain has been correctly configured as it is the easiest provider to enable.
Head into the Authentication section of Firebase and go into the Sign-in method tab.
Here you will click on Add new provider and select Google. You can edit some default parameters if you want, such as the project id, then insert the support email and confirm.
Configuring the custom domain
At this point we need to add our custom domain. We will have to add it in few different places: the Auth settings and the Hosting settings.
Auth settings
Head over the Settings tab of the Authentication section and then in the Authorized domains section you can add your custom domain.
You should have some default domains configured by Firebase.
depthlog.net for my custom app Depthlog even if we will use a subdomain for the auth provider.You can add any custom domain that you want, you can see that I added also the depthlog.vercel.app one since my app is hosted on Vercel.

Hosting settings
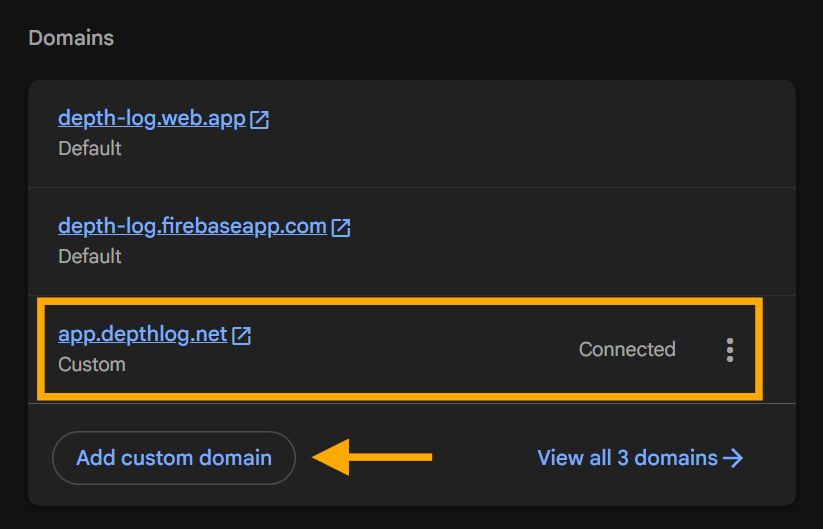
In the Hosting settings, you will have to add the actual domain that you want to use in your app.
This will be the domain that will host the provider popup. In the example, I added the domain app.depthlog.net. It is important that the subdomain is free and it is not used for something else.
If you do not use Firebase Hosting for your project, you will encounter a nuisance when adding the custom domain: everytime you will access the Hosting section, you will have to go through the "initialization steps".
Configuring Google Cloud Console
At this point we are almost done, we need to configure the domain in the Google Cloud Console so that our app can execute the code and authorize the redirecting url.
Head over to the following path in the Google Cloud Console API and services/credentials (double check that the selected project is the right one) and look for the OAuth 2.0 clients.
You will have different clients for the different apps that you have in your Firebase project, so one for Android, one for IOS, one for Web and so on.
In this case we will configure the Web client.
- Look for the entry named
Web client (auto created by Google Service)and click on it - Add the complete domain including the protocol in the Authorized JavaScript origins. In my case I will add the following domain
https://app.depthlog.net - Add to the Authorized redirecting URI the URI composed by your domain, followed by the suffix
__/auth/handler. So again, in my case it would behttps://app.depthlog.net/__/auth/handler. - Click on save.
Hooking the custom domain
Now everything is configured, the last thing is to configure your Firebase plugin in order to use the custom auth domain. To do that simply replace the authDomain value in your Firebase initialization.
In Javascript, when you initialize the Firebase app, simply change the authDomain key to your new custom domain:
import { initializeApp } from "firebase/app";
import { getAnalytics } from "firebase/analytics";

const firebaseConfig = {
  apiKey: "...",
  authDomain: "auth.depthlog.net", // <- Insert your custom auth domain here
  projectId: "...",
  storageBucket: "...",
  messagingSenderId: "...",
  appId: "...",
  measurementId: "..."
};

const app = initializeApp(firebaseConfig);
Now you have everything configured, you can test your custom domain by attempting to access using the Google provider.
Cheers!